
A new office chair arrives at your door in a box, and the parts are scattered like a puzzle. The good news? Assembling an office chair is one of the least intimidating furniture projects you can tackle. Most chairs come with all necessary hardware, clear instructions, and can be fully assembled in under 10 minutes if you know what to do. Whether you’re setting up a home office, replacing an old chair, or building out a workspace, this guide walks you through the straightforward assembly process step by step. You won’t need special tools or advanced skills, just patience, a screwdriver, and a small workspace.
Table of Contents
ToggleKey Takeaways
- Most office chairs can be assembled in under 10 minutes with just a screwdriver and basic tools, making it an approachable DIY project for any skill level.
- Organizing all parts by component and reading the manufacturer’s instructions before starting prevents mistakes and ensures you follow the correct assembly sequence.
- The pneumatic cylinder is the spine of the chair—insert it smoothly into the base hub and seat pan, then secure with bolts to enable proper height adjustment.
- Always test the height lever, tilt mechanism, and armrests after assembly to catch any loose fasteners or binding issues before moving the chair to its final location.
- Hand-tighten all fasteners first to prevent cross-threading, then snug them firmly with your screwdriver—avoid over-tightening, which can crack components or strip threads.
Gather Your Tools and Materials
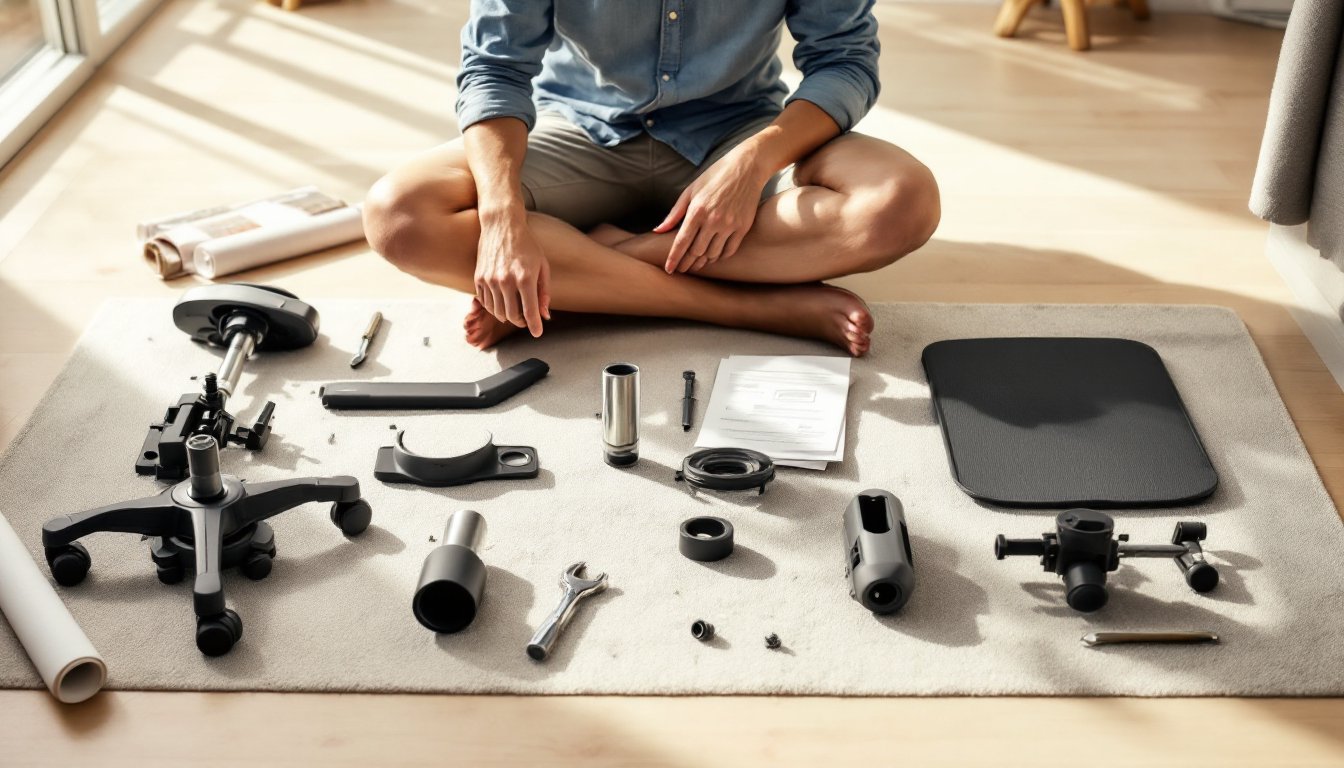
Before you start, lay out everything the chair shipped with. Most office chairs come with:
- One base (wheel assembly with five casters)
- One pneumatic cylinder (the tube connecting the base to the seat)
- One seat pan
- One backrest
- Two armrests (some chairs don’t include these)
- Mounting hardware: bolts, screws, washers, and an Allen wrench or Phillips head screwdriver
- Instruction sheet
In terms of tools, you’ll need:
- Phillips or flathead screwdriver (whichever matches your chair’s hardware)
- Allen wrench (often included in the box)
- Adjustable wrench or pliers (optional, helps tighten bolts if they spin)
Don’t skip reading the instruction sheet, even if it seems obvious. Different chair models attach components in slightly different orders. Some chairs bolt the backrest to the seat before attaching to the cylinder: others do it after. Following the manufacturer’s sequence saves frustration.
Prepare Your Workspace
Clear a flat, open area about 3 feet by 3 feet, a living room floor, garage floor, or large table works well. Lay down a blanket or towel if you’re working on hardwood or tile: it protects both the floor and prevents small hardware from rolling away.
Sort your parts by component: base, cylinder, seat, backrest, armrests, and hardware in one pile. This visual organization saves time when you reach each assembly step. Check that all parts are present before starting, opening the box afterward wastes time and breaks your workflow.
Position yourself so you’re kneeling or sitting comfortably. You’ll be working at ground level for the first few minutes, so avoid hunching over a high table. Good positioning prevents back strain and gives you better control over fasteners. If you’re assembling this solo, clear distractions: assembly goes faster with focus.
Assemble the Base and Casters
Most office chairs come with the base (hub with five wheel attachments) already assembled. Inspect it for damage or shipping stress. Check that all five casters spin freely, grab each wheel and turn it by hand.
If your base isn’t fully assembled, bolt the wheels (casters) to the hub using the provided hardware. Align the caster stem with the wheel slot, insert the bolt, and hand-tighten first. This prevents cross-threading. Then use your screwdriver or wrench to snug each bolt firmly, not gorilla-tight, just snug enough that the wheel won’t wobble or spin on the stem.
Lay the assembled base flat on your workspace with wheels pointing down. This is the foundation: everything else stacks on top. The reason chairs come this way is simple: wheels are fragile during shipping, and keeping them attached minimizes breakage. Your job is just to verify they’re secure and functional.
Attach the Pneumatic Cylinder and Seat
The pneumatic cylinder is a hollow metal tube that acts as the spine of your chair. One end slides into the hub on top of the base: the other end inserts into the underside of the seat pan. This component controls the chair’s height adjustment when you pull or push the lever.
Insert the cylinder’s lower end (the end with a smooth, tapered tip) into the center hole of the base hub. It should slide in smoothly with minimal resistance. Push it down until it’s fully seated, you’ll feel a subtle stop. Don’t force it: if there’s serious resistance, check that the cylinder and hub hole are aligned correctly.
Now place the seat pan upside-down on your workspace. Locate the underside hole where the cylinder inserts. Line up the seat pan’s hole with the cylinder’s upper end, and push the seat down onto the cylinder. It should fit snugly. Some chairs have mounting brackets or bolts that secure the seat to the cylinder: if yours does, bolt them tight using your screwdriver or Allen wrench. The seat should not wobble side-to-side or rock forward and backward when mounted correctly.
Flip the entire assembly upright carefully. You now have a functioning seat-and-base unit. Test the height lever (if present) to ensure the cylinder extends and retracts smoothly.
Install the Backrest and Armrests
The backrest attaches to the rear of the seat pan. Most chairs use bolts or screws through the mounting bracket on the backrest into threaded holes or bolt holes on the seat. Align the backrest bracket with the holes, insert the hardware, and tighten firmly. The backrest should sit perpendicular to the seat (or at a slight angle, depending on the chair design) and not wobble when you push on it.
For armrests, they typically bolt to the sides of the seat pan or to the seat itself. Insert each armrest bolt from underneath the seat if possible, this hides the fastener and looks cleaner. Hand-tighten first, then snug with your screwdriver. Test that armrests don’t move or creak when you press down on them. If they rattle or feel loose after tightening, check that the fastener isn’t cross-threaded and tighten it further.
Some budget chairs skip armrests entirely, and that’s fine. Others make them optional add-ons. Follow your instruction sheet to see if armrests are part of your model. Don’t force armrest bolts into holes that aren’t designed for them: you’ll strip the threads or crack the seat pan.
Test and Adjust for Comfort
Sit down in the chair and test all moving parts. Adjust the seat height by pulling the lever under the seat. The cylinder should extend and compress smoothly without grinding or sticking. If it feels rough or makes noise, check that the cylinder isn’t binding. Sometimes shipping can misalign it slightly: verify it’s fully inserted into both the base and the seat.
Tilt the chair backward if it has a tilt mechanism. The backrest should recline and return to upright position smoothly. Test any other features: lumbar support, tension adjustment, or locking mechanisms. Engage all controls to ensure they work before you declare the chair complete.
Press down on each armrest and wiggle them. They shouldn’t shift. Rock the seat side-to-side and forward-backward. The chair should feel stable, not wobbly. If you notice looseness anywhere, return to that component, identify the culprit bolt or screw, and tighten it. A small amount of creaking after new assembly is normal: it usually stops as materials settle. But, loud cracks or pops suggest a fastener came loose, locate and fix it immediately.
Walking through step-by-step furniture assembly guides can help if you encounter unusual issues or your chair has non-standard parts. Spend a few minutes testing before you move the chair to its final location, you don’t want to discover a problem after it’s positioned in your office.
Conclusion
Assembling an office chair is straightforward if you follow the manufacturer’s sequence and don’t rush. Most people complete the job in 10-15 minutes once they’ve gathered their tools and organized their parts. The key is attention to small details: fully seating the cylinder, tightening fasteners snugly but not excessively, and testing every moving part before declaring victory. With a little patience and a screwdriver, you’ll have a properly assembled, comfortable workspace chair ready for years of use.