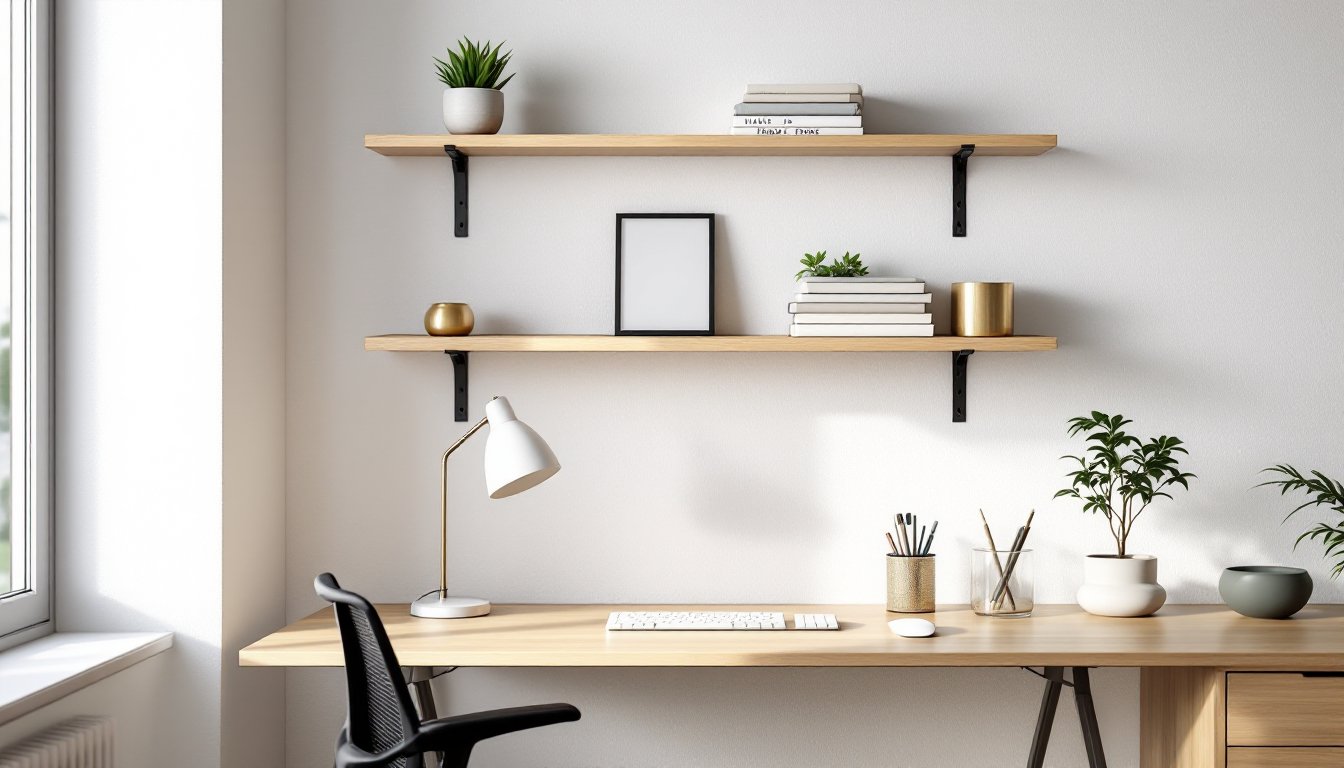

A well-organized home office hinges on smart storage, and floating shelves deliver both function and visual appeal without eating up floor space. Unlike traditional bookcases that anchor a corner, floating shelves mount flush to the wall, creating clean sightlines and a modern aesthetic that works for minimalist spaces or packed home offices alike. They’re perfect for displaying books, plants, organizing work supplies, and keeping your desk surface clear, but they demand proper planning to avoid a wobbly installation or a disaster on the floor below. This guide walks you through selecting materials, installing shelves safely, and arranging them for both productivity and style.
Table of Contents
ToggleKey Takeaways
- Floating shelves for office storage maximize space without sacrificing visual openness, making even small workspaces feel less cramped and more organized.
- Proper installation requires anchoring brackets into wall studs with lag bolts, or using heavy-duty drywall anchors for loads under 15 pounds—never skip the stud-finding step.
- Material choice depends on weight capacity and style: solid wood offers versatility and warmth, metal brackets with wood combine durability and aesthetics, while glass provides a modern look but demands careful maintenance.
- Strategic arrangement using the rule of thirds—alternating tall items, low items, and empty space—creates an intentional, productive display that reduces desk clutter without feeling cramped.
- Budget-friendly floating shelf projects start under $50 per shelf when building from scratch with pine boards and steel brackets, making them accessible for most home offices.
- Always load shelves gradually and monitor for movement; uneven weight distribution or loose fasteners can cause dangerous flex or collapse over time.
Why Floating Shelves Are Perfect for Home Offices
Floating shelves solve a common home office dilemma: needing storage without sacrificing the sense of space. Unlike floor-standing cabinets or closed bookcases, floating shelves keep sightlines open, making even a small office feel less cramped. They’re ideal for displaying reference materials, keeping frequently used items within arm’s reach, and reducing desk clutter, a key factor in staying focused during the workday.
From a design perspective, floating shelves offer flexibility that traditional furniture can’t match. You control the height, spacing, and arrangement, letting you tailor storage to your workflow rather than forcing your workflow around the furniture. Plus, they work in almost any aesthetic: minimalist and sleek with metal brackets and glass, warm and rustic with reclaimed wood, or corporate-clean with painted wood and subtle hardware.
Another advantage is reversibility. Because they mount to the wall, they don’t require floor space, so you can reposition your desk, chair, or other furniture without moving the storage. If you’re renting, wall anchors (discussed later) let you install shelves without permanent damage, though it’s wise to check your lease first. The visual openness also makes your office feel larger, a genuine asset when your workspace doubles as a guest room or sitting area.
Choosing the Right Materials and Design
Before you buy or build, clarify what you need: weight capacity, aesthetic, budget, and durability. Are you storing heavy textbooks and reference binders, or mostly light decor and a few small plants? Will the shelf anchor to studs (optimal) or drywall with anchors (acceptable for lighter loads)? Let’s break down your main material options.
Wood vs. Metal vs. Glass
Solid wood shelves offer warmth and durability, and they’re forgiving to work with if you’re building or customizing them. Pine, oak, and maple are common and affordable: they take stain or paint easily. A typical 3/4-inch-thick hardwood shelf can safely support 25–50 pounds per linear foot when properly anchored to studs. Wood is versatile for any office style, though it can sag over time if undersized or overloaded.
Metal brackets with wood shelves combine the best of both worlds: metal brackets (steel or aluminum) handle the weight while wood provides visual warmth. These are what most off-the-shelf floating shelf kits include. Metal is also lighter than solid wood and less prone to sagging. Powder-coated steel brackets resist rust and come in black, white, and metallic finishes.
Glass shelves look sleek and modern, making a room feel more open. They’re easy to clean and don’t absorb dust like wood. But glass is fragile, heavier than it appears, and requires sturdy metal brackets, typically rated 25–35 pounds per shelf. Glass also shows fingerprints and clutter more visibly, so if you want a minimal look, you’ll need discipline in what you display. Tempered glass is essential for safety: standard glass can shatter dangerously if struck or overloaded.
Metal shelves (steel or aluminum) are industrial-looking and very durable. They’re heavier than comparable wood or glass, so installation into studs is crucial. Metal shelves often come pre-drilled and paired with brackets, making assembly straightforward. They’re less common for warm, residential home offices but excellent for modern or minimalist spaces.
Your choice depends on load, style, and maintenance tolerance. Wood is the most forgiving and versatile: metal with wood is the crowd-pleaser: glass is stylish but demanding. Consider also the finish: unfinished wood needs sealing or painting, which adds a prep step but lets you customize color.
Installation Basics: What You Need to Know
Proper installation determines whether your shelves are safe or a liability. Here’s the non-negotiable workflow.
1. Locate and mark studs. Use a stud finder (electronic, about $15–30) to locate wall studs behind drywall. Mark them with a pencil. Studs are spaced 16 or 24 inches apart and are about 1.5 inches wide (nominal 2×4 lumber, which is actually 1.5″×3.5″). Anchoring brackets into studs is the gold standard, each bracket should hit at least one stud.
2. Use the right anchors if studs aren’t available. If you can’t align brackets with studs, heavy-duty drywall anchors (toggle bolts or molly bolts) can support shelves with moderate weight (under 15 pounds total). For anything heavier, you’ll need studs. French cleats, a pair of interlocking beveled wood strips, distribute load across a wider drywall area and are excellent for avoiding studs, though they add about 1.5 inches to the wall depth.
3. Level and mark holes. Use a 24-inch level (not a 12-inch: accuracy matters) to mark the shelf’s height. A typical office shelf sits 12–18 inches above desk height or at eye level when seated. Mark holes for brackets, ensuring they’re level and symmetrical. Recheck with the level.
4. Pre-drill if necessary. If using wood screws into studs, a pilot hole (slightly smaller than the screw) prevents splitting. If using drywall anchors, follow the product’s instructions, most require drilling a hole slightly larger than the anchor.
5. Secure brackets firmly. Tighten all fasteners fully. Loose hardware will shift under load, and you’ll notice it days or weeks later when things feel wobbly. Use lag bolts or lag screws (3/8-inch diameter, 3.5–4 inches long) into studs for maximum holding power: wood screws (#10 or #12 gauge) work for lighter setups. Check local building codes, some jurisdictions have specific requirements for shelving in residential spaces.
6. Install the shelf. Slide or screw the shelf onto the brackets. If brackets have mounting holes on top, secure them with screws (or fasteners specific to the bracket design). Double-check that everything is level and stable before loading.
7. Load gradually. Set items on the shelf slowly and monitor for flex or movement. If something feels off, stop and re-examine the installation. Weight should distribute evenly across the shelf: don’t cluster all heavy items on one side.
If you’re uncertain about wall construction, need to anchor into plaster or tile, or want shelves to support more than 40 pounds, consult a contractor or handyman. A faulty installation isn’t worth the risk or the cleanup.
Styling and Organizing Your Office Shelves
Once your shelves are installed securely, arrangement becomes both functional and aesthetic. Start by grouping items by category: books, office supplies, decor, and plants. Vertically stack heavier items (textbooks, binders) and reserve the front edge for lighter, visual pieces (small plants, a framed photo, a desk trophy).
Follow the “rule of thirds” loosely, vary shelf heights visually by alternating tall items (books standing upright) with low items (a potted plant, a small stack) and empty space. Empty space isn’t wasted: it’s breathing room that makes the display feel intentional, not crammed. This applies whether your shelves are painted, stained, or glass.
Consider a small small desks for home office if you’re working in a compact space: shelves above or beside a minimal desk create a cohesive, organized zone. Group supplies in clear containers or small bins to reduce visual chaos and keep items like pens, sticky notes, and cables tidy. If you store important files or documents, pair shelves with a file cabinet for home office below or nearby for a unified storage approach.
Lighting matters too. If shelves are over a desk, consider a small LED strip light mounted underneath the top shelf (or on the back edge) to illuminate the work surface and highlight displayed items. This also reduces glare if you’re positioning shelves above a monitor.
Rotate decor seasonally if you like, swapping out plants or artwork keeps the space from feeling stale. And be ruthless about what stays: if an item doesn’t serve your work or spark joy, it’s clutter taking up valuable real estate.
Budget-Friendly Solutions and DIY Tips
Floating shelves don’t demand a big budget. Off-the-shelf kits (metal brackets + basic wood shelves) start around $30–60 per shelf and are reliable for light to moderate loads. Brands like Rubbermaid, Ikea, and AmazonBasics offer decent options: focus on bracket thickness and mounting hardware rather than flashy finishes.
If you’re building from scratch, the math is simple. A 36-inch-long pine 1×10 board (nominal: actual dimensions are 0.75″ × 9.25″) costs $12–25 depending on wood grade and region. A pair of heavy-duty steel brackets runs $20–40. Add stain or paint ($5–15), and you’re in for under $50 per shelf, less than many kits. Free plans for basic floating shelves are readily available from resources like Ana-White, which include cutting guides and bracket sizing.
For tool access, borrow or rent instead of buying. A miter saw ($60/day rental) makes cleaner crosscuts than a circular saw if you’re trimming shelf length. A stud finder ($20–30) is cheap to buy and invaluable for every wall project you’ll ever do. Fasteners, bolts, screws, anchors, are inexpensive: don’t cheap out here.
If you want a rustic look, reclaimed wood or pallet wood can work, but sand and seal it properly to avoid splinters and to ensure it’s food-safe if you’ll display anything edible. Pallets are often treated with chemicals: verify they’re heat-treated (marked “HT”) rather than chemically treated (marked “DB”) before using them in living spaces.
One pro tip: cut a scrap of wood matching your shelf thickness and use it as a spacer when mounting brackets. This ensures consistent overhang and a polished look. And always test your level on a known-flat surface first: a bent level is a silent killer of otherwise solid work. Resources like Fix This Build That and The Handyman’s Daughter offer detailed project walkthroughs and tool guidance if you’re new to this kind of work.
Conclusion
Floating shelves are one of the smartest upgrades a home office can get: they’re practical, adaptable, and surprisingly doable as a DIY project. Pick materials that match your aesthetic and load needs, anchor them securely into studs or quality drywall anchors, and arrange them with intention. When done right, they’ll serve your workspace for years, and they won’t clutter the visual space while they do it.